As a hoverboard enthusiast, I know the excitement of hitting the streets on your self-balancing scooter. But before you can embark on your next adventure, you need to ensure your hoverboard is fully charged and ready to go. So, how long does it take to charge a hoverboard? Let’s dive into the details!
The Charge Time Breakdown
The charging time for your hoverboard can vary based on several factors, but here’s a general breakdown:
Standard Hoverboards
These hoverboards typically take between 2 and 4 hours to charge fully. Standard hoverboards usually have a battery capacity of around 4,000 mAh (milliampere-hours) and come with a charger that has an output of 42 volts and 2 amps.
Fast-Charging Hoverboards
As the name suggests, these models charge faster, typically taking between 1 and 2 hours to reach a full charge. They often have a larger battery capacity, around 5,000 mAh, and come with a beefier charger outputting 54 volts and 2 amps.
Lithium-Ion Hoverboards
These are the speedsters of the hoverboard world when it comes to charging. With a smaller battery capacity of around 2,000 mAh, they can fully charge in as little as 30 minutes to 1 hour, thanks to their 42-volt, 2-amp chargers.
Understanding Range and Battery Life
Once your hoverboard is fully charged, you’ll want to know how far you can ride before needing to recharge. The average range of a fully charged hoverboard can vary based on several factors, such as:
- Standard Hoverboards: Most standard models can cover approximately 7 to 8 miles on a single charge, making them suitable for short commutes and recreational rides.
- High-End Hoverboards: Premium models with larger battery capacities can achieve a range of 10 to 15 miles on a single charge, perfect for longer rides and outdoor adventures.
- Specific Models: For example, the Razor Hovertrax Prizma is a great option for kids and offers a decent range, while the Hover-1 Titan Hoverboard is a solid choice for adults.
Remember, factors like terrain, rider weight, and speed can also affect the actual range, so it’s always a good idea to keep an eye on your battery level and recharge when necessary.
⇒ Learn How To Ride A Hoverboard
Maintaining Your Hoverboard Battery
To ensure your hoverboard’s battery stays in top shape and provides optimal performance, it’s essential to follow some maintenance tips:
Charge Properly
- Avoid Overcharging: Leaving your hoverboard plugged in for extended periods after it’s fully charged can lead to battery damage. Unplug it promptly once it’s fully charged.
- Avoid Undercharging: On the other hand, letting your battery completely discharge and remain uncharged for long periods can also harm its capacity. Charge your hoverboard regularly, even if you’re not using it frequently.
Storage
- Cool and Dry Place: Store your hoverboard in a cool, dry location away from direct sunlight or extreme temperatures, as excessive heat or cold can affect battery performance.
- Regular Check: Even if you’re not riding your hoverboard often, give it a quick charge every three months to keep the battery healthy and ready for your next adventure.
Inspect Regularly
- Battery and Charger: Periodically inspect your battery and charger for signs of damage, wear, or corrosion. Address any issues promptly to prevent further damage.
- Swollen Battery: If the plastic casing around the battery appears swollen or warped, it’s a sign that the lithium-ion cells have become unstable. Replace the battery immediately to avoid fire risks.
Use the Right Charger
- Always use the recommended charger that comes with your hoverboard. Using an incompatible charger can harm the battery and shorten its lifespan.
- Avoid using third-party chargers unless they are specifically designed for your hoverboard model.
By following these simple tips, you can help extend the life of your hoverboard’s battery and ensure safer, more enjoyable rides.
⇒ How Fast Can a Hoverboard Go?
Battery Degradation Over Time
It’s important to note that hoverboard batteries, like most rechargeable batteries, do experience a gradual loss of charge capacity over time. This phenomenon is common and is caused by chemical changes within the battery cells due to repeated charging and discharging cycles.
In the first year of use, hoverboard batteries typically retain around 80% to 90% of their original capacity. Beyond the first year, the rate of capacity loss may increase, and after several years, the battery may hold only 60% to 70% of its initial charge.
Factors like usage frequency, temperature, charging habits, and the quality of the battery cells can all impact the rate of battery degradation. If you notice a significant decrease in range or performance, it may be time to consider replacing the battery to restore your hoverboard’s original capabilities.
⇒ How to Calibrate Your Hoverboard
Troubleshooting Charging Issues
Sometimes, you may encounter charging issues with your hoverboard. Don’t worry; there are a few troubleshooting steps you can take:
Check the Indicator Lights:
- While the charger is plugged in, examine the indicator lights on your hoverboard.
- If the light indicating charging is on, that’s a good sign. Leave it plugged in for 10-15 minutes and then check the battery percentage. If you see at least a 1% increase, congratulations – you’ve fixed the issue!
- If no light turns on when you plug in the charger, proceed to the next steps.
Inspect the Charger:
- Faulty chargers are a common cause of charging problems.
- Check if the charger is working fine, ensuring the cable isn’t damaged and is properly plugged into the power source.
- Test your charger on another hoverboard (if possible). If it works, the issue lies elsewhere.
- If the charger doesn’t work on another hoverboard or has a broken wire, consider replacing it with a recommended charger from your brand.
Reset the Battery:
- If charging still doesn’t start, unplug the charger and reset the battery.
- Turn off your hoverboard, disconnect the battery (if possible) by unplugging the connector, wait for a few minutes, then reconnect the battery.
- Plug in the charger again and check if it starts charging.
Inspect Wiring Connections:
- Hoverboard battery charging issues can be caused by faulty wire connections.
- Ensure all wires are securely connected. If any wires are loose or damaged, fix them.
- Properly connected wiring ensures efficient charging.
Motherboard and Charging Pin:
- Sometimes, issues with the motherboard or charging pin can affect charging.
- If you’ve tried the above steps and still face problems, consider seeking professional help or contacting the manufacturer.
Remember, hoverboards are our trusty travel companions, and a little care goes a long way in keeping them running smoothly.
⇒ Why Is My Hoverboard Beeping?
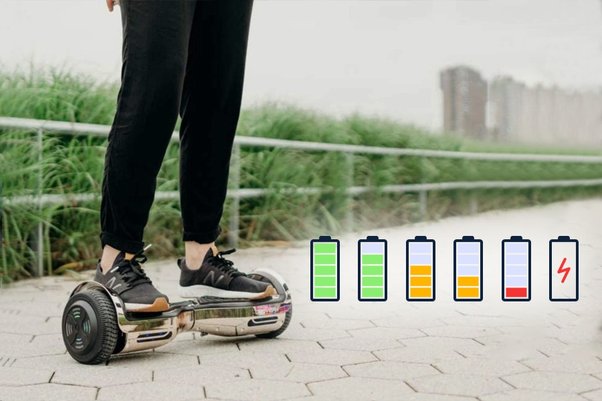
Knowing When Your Hoverboard is Fully Charged
Finally, let’s talk about how to know when your hoverboard is fully charged and ready for your next adventure:
LED Light on Charger:
- Most hoverboard chargers have an LED light indicator.
- While charging, the light is typically red.
- Once the hoverboard is fully charged, the light should change to green (or another color, depending on the model).
- When you see the green light, it indicates that the charge is complete, and you can disconnect the hoverboard from the charger and remove the charger plug from the socket.
Hoverboard Battery Indicator:
- Some hoverboards have a battery level indicator located on the frame of the board.
- Check this indicator to know when your hoverboard is charging and when it’s fully charged.
- Once it shows a full battery or 100%, your hoverboard is good to go.
Remember to follow the manufacturer’s guidelines for charging and maintenance to ensure your hoverboard stays in top condition and provides you with many hours of fun and excitement on the road.
Conclusion
Charging your hoverboard may seem like a simple task, but understanding the nuances can go a long way in ensuring your self-balancing scooter’s longevity and performance.
By familiarizing yourself with the charging times, ranges, and battery maintenance tips we’ve discussed, you’ll be well-equipped to embark on your next hoverboard adventure with confidence.
Remember, proper charging habits, regular inspections, and the use of recommended chargers are key to keeping your hoverboard’s battery in top shape. Don’t hesitate to troubleshoot any charging issues promptly, and consider replacing the battery if you notice a significant decrease in range or performance over time.